
Add IP On VM using Hyper-v Objective and Requirement
this article will show you how to use network birdge to configure and add Public IP fail over to the VM to access the internet
Requirements
- Dedicated Server with Windows Server 2012 or later .
- One Failover IP and MAC address of the fail-over IP.
The following Steps are required to start adding the IP to your VM
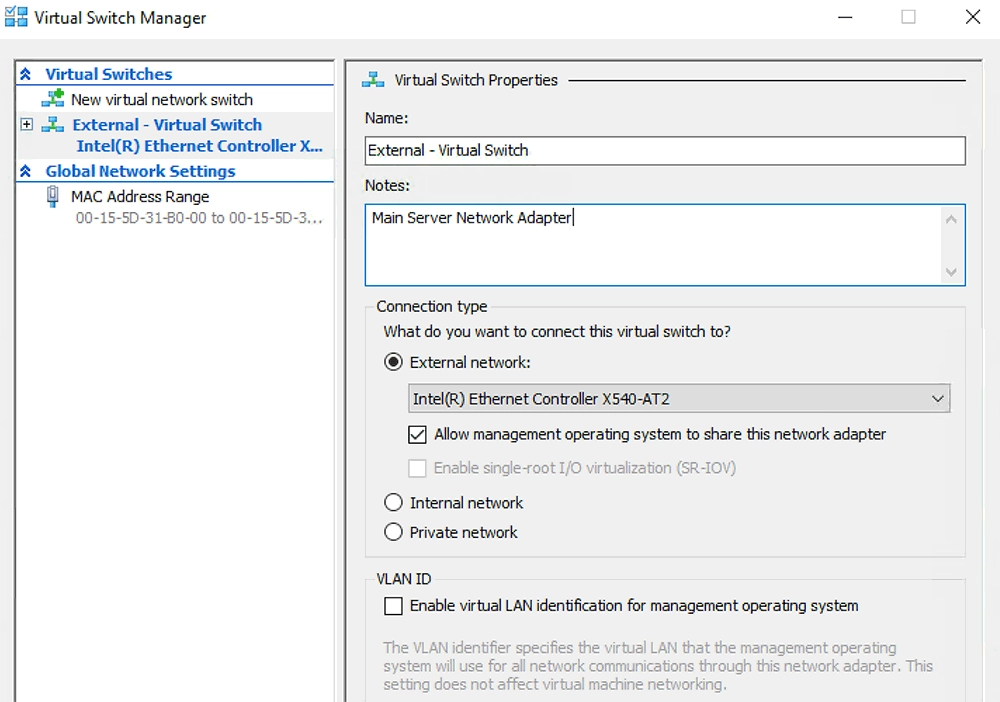
Create Virtual Switch on Main Server Hyper-V
“If your hyper-v has the External Virtual Switch with checked allow management OS to share this network adapter option , you can ignore this step”
- Get All IP Configurations on the main server by running IPconfig/ALL command.
- In the Hyper-V Manager Create New Virtual Switch.
- Set Connection Type to External.
- Select the Adapter Associated with your server’s IP.
- Check Allow Management OS to share this network Adapter.
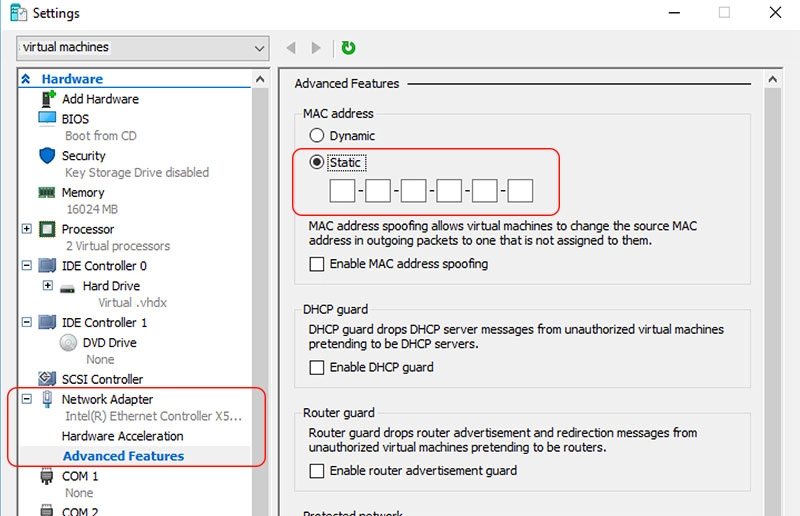
Add Virtual MAC address for IP of the VM on Hyper-V
Now you can change the settings of the VM that hosted on your server by adding the MAC address of the Fail-Over IP, “Please Note that the VM server status should be shutdown“.
- Select the VM Server that you want to edit.
- Click VM Settings to edit Virtual Machine Properties.
- Expand the network Adapter of the VM and click Advance Features.
- Change the MAC address to “Static” and enter the fail-over virtual MAC address .
- Press OK to apply the changes.
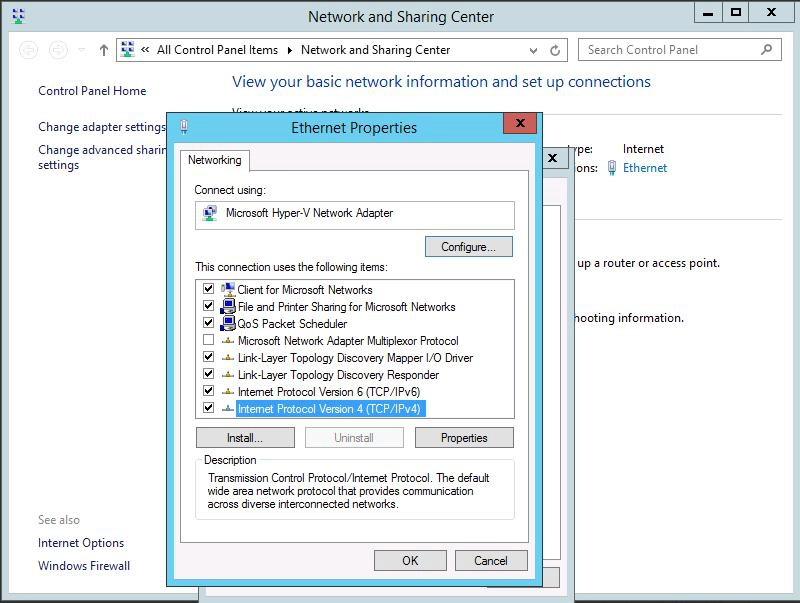
Configure the Network Adapter inside the VM “Windows Server”
Now we start configuring the VM network adapter to assign the IP and Gateway and DNS Server
- Start the VM and login as administrator.
- From Control Panel > Network and Share Center.
- Click on Eithernet Link connections.
- Click the properties to view Eithernet properties.
- Select Internet Protocol Version 4 (TCP/IPv4).
- Click on Properties button to show IPv4 Properties as bellow.
- Then From the IPv4 Properties select Use the following IP address.
- Enter the Fail-Over IP address.
- Enter 255.255.255.255 into the subnet mask.
- In the Default gateway enter your Main server IP address by replacing the last cell numbers with 254.
- Enter 213.186.33.99 “or the Preferred DNS shown in IPconfig/ALL from the main server” into the preferred DNS Server .
- Press OK and ignore the message that warning you about the gateway IP and assigned IP not being the same subnet.
- Reboot the VM server to let the changes get affected


