WordPress is web publishing software you can use to create a beautiful website or blog. It just may be the easiest and most flexible blogging and website content management system (CMS) for beginners.So In this Tutorial we are going step by step to Install WordPress using Softaculous
What is WordPress
WordPress is an online, open source website creation tool written in PHP. its the most powerful blogging and website content management system (or CMS) in existence today.
Install WordPress in Your cPanel account using Softaculous
You have two options to install the WordPress within your cPanel Package from XsoftHost , the quick installation and customize install :
- Login to your cPanel control panel.
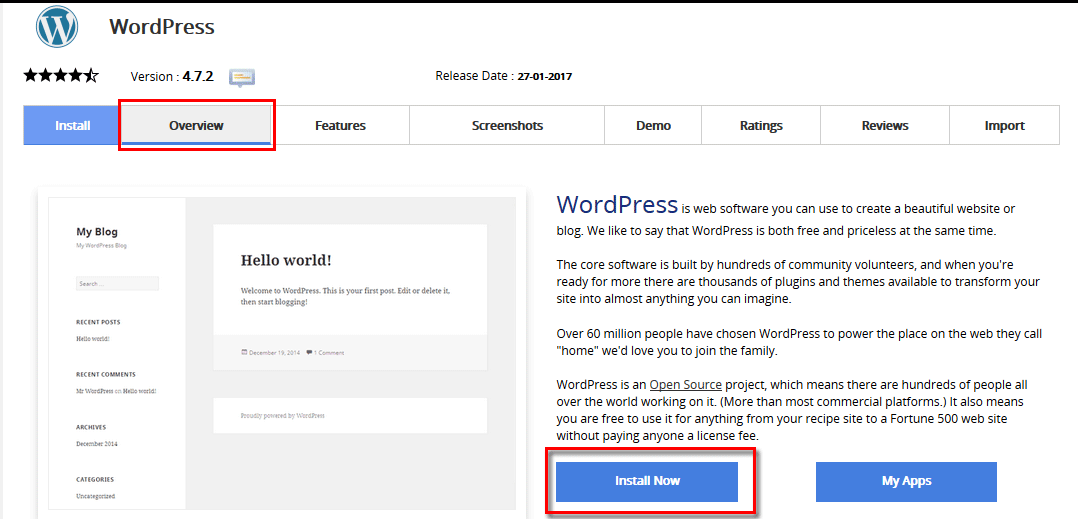
- From your cPanel Dashboard home locate Softaculous Apps Installer Section and under Scripts, click WordPress icon.
- On the Next WordPress Page for Quick installation just from Overview Tab, click the Install Now button.
- To Install the WordPress by setting or changing the default settings, Click Install Tab
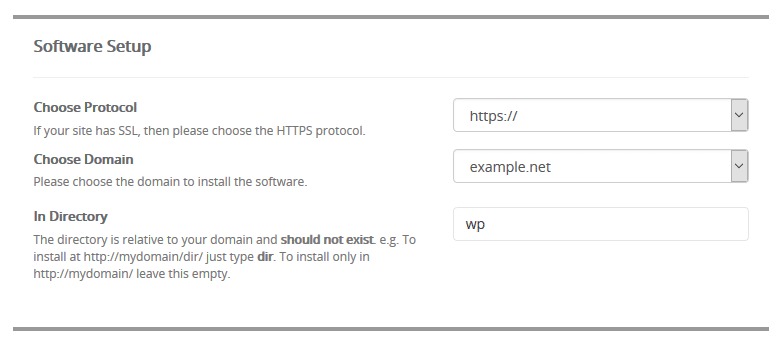
- From Software Setup Section choose :
- Choose Protocol: If your website support SSL or already install ssl certificate you can choose from https://, https://www , if not either choose http:// or http://www.
- Choose Domain:Select the domain name you want to install WordPress Software.
- In Directory:Enter the folder name under the root of the website, if you want the WordPress to be your default website pages leave it blank.
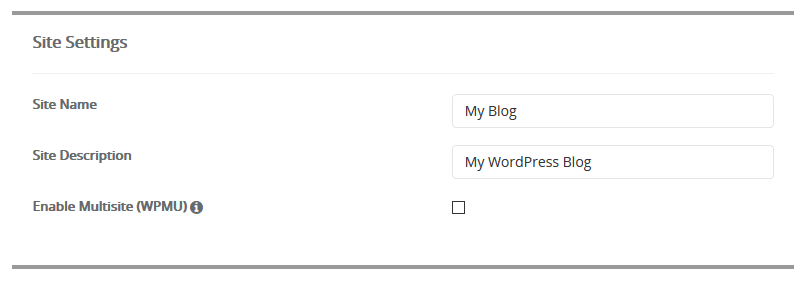
- For Site Settings Section:
- Site Name :Enter the General Site Name.
- Site Description:Type your site descriptions.
- Enable Multisite (WPMU):This feature will Enable Multisite option for your WordPress blog.Your server must support Apache mod_rewrite to use this feature.
- For Admin Account:
- Admin Username:Type your WordPress Administrator username.
- Admin Password:Enter WordPress Admin Password.
- Admin Email : Enter WordPress Admin email address for notifications.
- Choose Language:
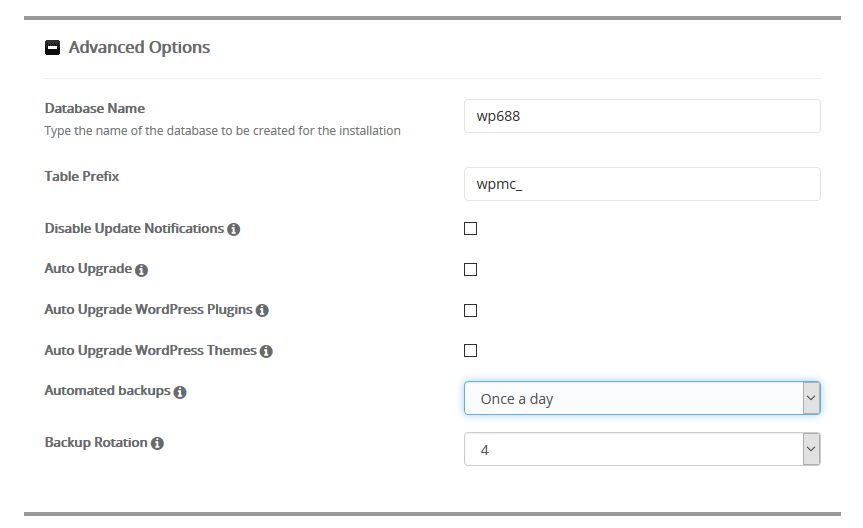
- Advanced Options:
- Database Name: MySQL database name for WordPress software Instance.
- Table Prefix : MySQL table Prefix for the WordPress Database.
- Disable Update Notifications:If checked you will not receive an email notification for updates available for this installation.
- Auto Upgrade:If checked, this installation will be automatically upgraded to the latest version when a new version is available.
- Auto Upgrade WordPress Plugins:If checked, all the active WordPress plugins installed for this installation will be automatically upgraded to the latest version when your script installation is upgraded.
- Auto Upgrade WordPress Themes :If checked, the active WordPress theme for this installation will be automatically upgraded to the latest version when your script installation is upgraded.
- Automated backups : Softaculous will take automated backups via CRON as per the frequency you select
- Backup Rotation : If the backup rotation limit is reached Softaculous will delete the oldest backup for this installation and create a new backup. The backups will utilize your space so choose the backup rotation as per the space available on your server.
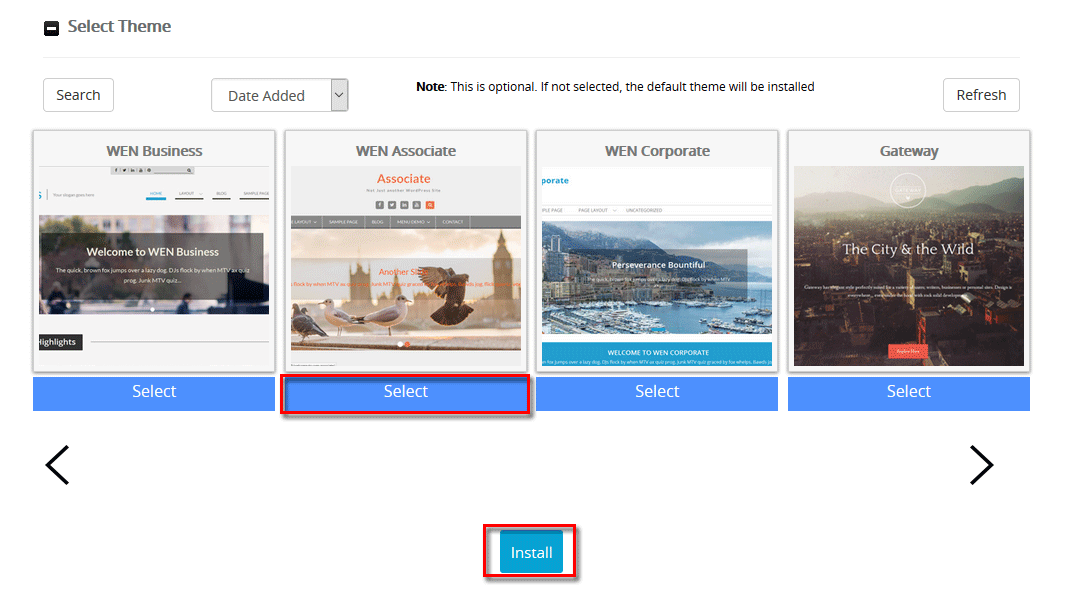
- Select Theme:Browse the Theme you want to install for your WordPress website design, you can fill the Email installation details to text box by email address to send notification once the installation finish , and click Install button.
- From Software Setup Section choose :
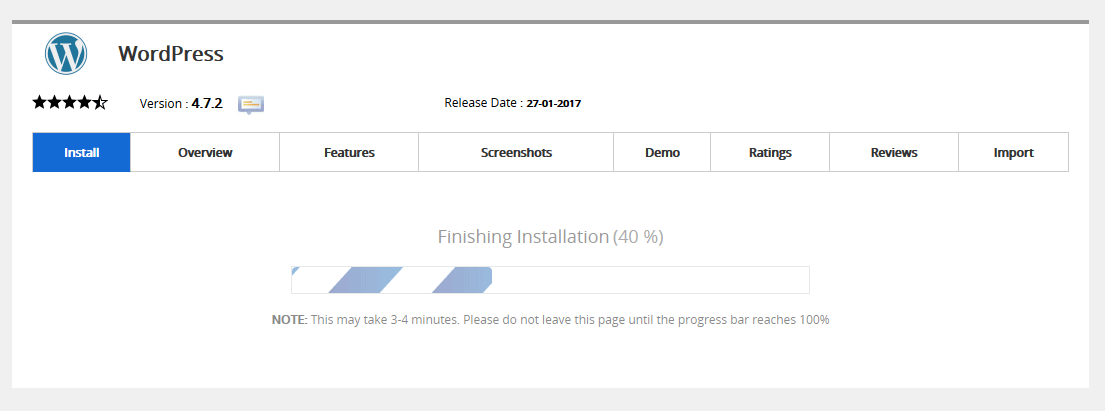
Once you start the installation process , you can see the Progress of WordPress
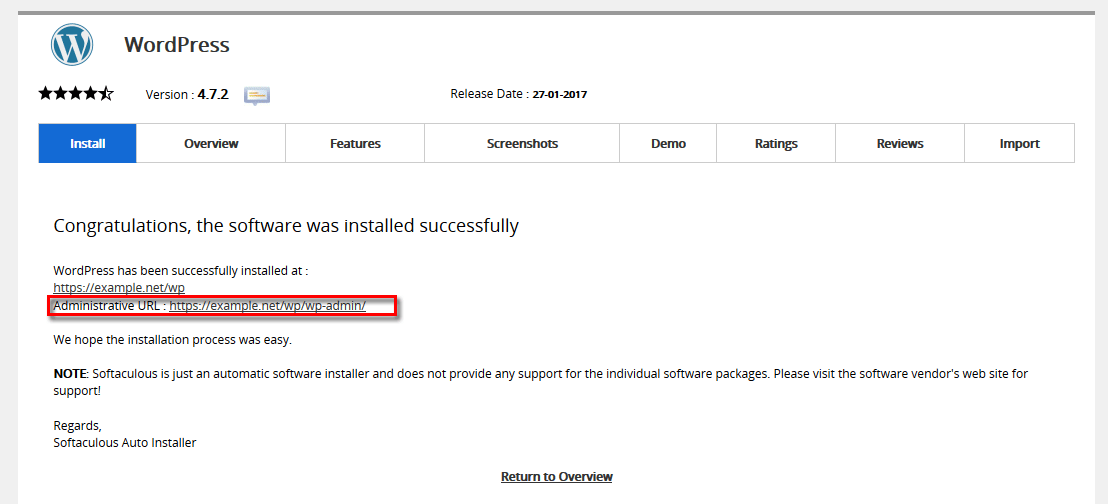
At the end of WordPress installation Progress the information about how to login and start manage your WordPress website appears as bellow:


